THERMOFORA · Updated 2025 · 11 min read
The part comes off the mold looking fine. An hour later it is bowed. A day later it is twisted. Sometimes you pull it and it warps right in your hands, sometimes it sits on the shelf for a week and then goes. Vacuum forming warping is the most common problem we deal with in production shops, and in almost every case it has nothing to do with the forming step. It happens during cooling.
Below is every root cause we have documented across production runs, with the mechanism behind each one, specific numbers, and what to actually change.
Why Warping Happens at All
When you heat a thermoplastic sheet to forming temperature, the polymer chains go mobile. The mold locks them into a new shape. As the part cools, those chains try to contract. If every area of the part contracts at the same rate and in the same direction, you get the geometry you wanted. If one zone contracts faster than another, the differential pulls the part out of shape.
That is it. Differential shrinkage between zones is behind almost every warp we see. The trigger varies, but the mechanism is always the same. One side wants to be shorter than the other.
Part 1
Cooling Problems
In our experience, cooling is responsible for the majority of warping complaints. Demolding too early, uneven airflow, a mold that heats up through the run. All of these are fixable without touching the mold geometry or changing material.
1. Demolding Too Early
What you seeThe part looks perfect at the moment of demolding, then warps within minutes or over the next few hours. Flat panels are the most obvious case, but it happens on complex geometry too.
Root causeEach polymer has a temperature below which the part holds its shape without the mold supporting it. For acrylic, that is around 65–70°C. Pull it out above that and the open-air side cools faster than the side that was against the tool. That differential is enough to pull a flat panel into a bow or twist a thin-walled part completely out of spec.
Fix- Extend the cooling cycle. This is the single most effective change in most shops.
- Keep fans running on the part while it is still in the mold. Once you pull it, directed cooling is much less effective.
- A water mist system combined with fans can cut cooling time by up to 30% while actually improving uniformity.
- Use a contact thermometer or IR sensor at the thickest point of the part before demolding, not a timer.
- For PP and HDPE: air cooling alone will not get you there. You need water-cooled molds.
2. Uneven Cooling Across the Part
What you seeTotal cooling time is fine, but the part still warps. Edges stay flat while the center of a large panel dishes. Or the part is fine at the start of the run and progressively worse by the end.
Root causeThe center of a large flat part has less surface area relative to its volume and gets less airflow than the edges. It stays warm longer and keeps shrinking after the edges have already locked in. That gradient is enough to cup a panel that should be dead flat.
The second pattern, where parts get worse through the run, is the mold heating up. We see this constantly in shops without active mold cooling. The tool starts cold and progressively absorbs heat from each forming cycle. By cycle 40 or 50, it is running 40°C hotter than at cycle 1, and the parts show it.
Fix- Check that fan coverage actually reaches the center of the part, not just the perimeter.
- For large-format work, one fan is rarely enough. Position multiple fans to cover the full area.
- Active water-cooled mold temperature control is the only way to hold a stable baseline from the first cycle to the last. Everything else is a workaround.
- Calculate cooling time from the thickest wall section, not the average.
3. Progressive Mold Heating in Long Runs
What you seeFirst parts are acceptable. By the second half of the run they are all warped in the same direction, consistently worse as the run goes on.
Root causeAn aluminum mold with no active cooling can go from 20°C at startup to 60°C or higher after 50 cycles. At that point the tool is no longer pulling heat from the part at anything like the rate it was at the start. Parts come off warmer, shrink more, shrink less uniformly.
Fix- Water-cooled mold temperature control is the complete solution. Without it you are constantly chasing a moving target.
- If you do not have active cooling: run 10 to 15 warm-up cycles at the start of each session before you start collecting product. Let the mold reach a stable temperature, then begin.
- Measure part dimensions at the start, middle, and end of each run. Dimension drift tells you directly how much the mold temperature is drifting.
4. Chill Marks and Localized Distortion
What you seeSlightly thicker zones on the part, with localized warping concentrated around those zones after demolding.
Root causeA chill mark forms where the hot sheet makes early contact with a cold surface before it has fully formed. That contact zone is thicker than the wall around it. Thicker means more thermal mass, which means it is still warm and still shrinking when the thinner surrounding wall has already set. The result is localized pulling right at the chill zone boundary.
Fix- Pre-heat the mold to 60 to 80°C. This reduces the temperature shock when the sheet first contacts the tool.
- For plug-assist work: pre-heat the plug to 10–15°C below the material forming temperature. Wrapping the plug in felt or flannel helps significantly on short runs.
- Faster vacuum application means the sheet spends less time draped on cold surfaces before it fully forms.
Part 2
Material Shrinkage
Not all plastics shrink the same amount, and the difference between materials matters more than most people expect. Acrylic shrinks 0.4 to 0.6%. HDPE shrinks 3.0 to 3.5%. That is nearly an order of magnitude difference, and it completely changes what your cooling setup needs to handle.
5. High Shrinkage Materials: PP, HDPE, LDPE
What you seeParts from crystalline polymers warp consistently and badly under the same cooling conditions that work fine for ABS or acrylic.
Root causeCrystalline and semi-crystalline polymers do not just cool, they crystallize. As the temperature drops through the crystallization range, molecular chains pack into ordered structures and the part undergoes a sudden volume reduction. This is 2 to 5 times the shrinkage of amorphous materials, and it is very sensitive to how fast you cool. If one area of the part enters the crystallization range before another, the differential shrinkage warps it.
Fix- For PP, HDPE, and PET: water-cooled molds are not optional. Air cooling cannot control the crystallization process uniformly across the part — see the full thermoforming plastics guide for shrinkage rates by material.
- For PP specifically, set mold water temperature to 40–60°C. A warm mold allows crystallization to proceed uniformly rather than racing through one zone at a time.
- Build shrinkage compensation into your mold dimensions. For PP that means 1.5–2.2% larger in the mold than the finished part spec.
6. Sheet Molecular Orientation
What you seeEvery part in the run warps in the same direction. Consistent, repeatable, directional. Not random part to part.
Root causeExtruded sheet has the polymer chains stretched in the direction the material traveled through the extruder. That is the machine direction. The sheet shrinks more along that axis than across it. When you thermoform it, that anisotropy carries straight into the finished part. If your mold happens to align with it, the part shrinks unevenly and bows.
Fix- If the warping is consistent and directional: rotate the sheet 90 degrees relative to the mold and run a test. If the warp direction shifts with the sheet, orientation is your cause.
- For parts where this matters, request a material certificate with residual orientation data. Specify maximum 5% orientation for precision work.
- Forming at the upper end of the recommended temperature range helps. More heat gives the chains more time to relax the extrusion orientation before they lock in.
Part 3
Residual Stress and Delayed Warping
The tricky cases are the ones that show up days or weeks after production. The part looked fine. Passed inspection. Then it starts to bow on the shelf or in service. This is almost always frozen internal stress releasing over time.
7. Residual Forming Stress
What you seeGeometry is correct at demolding and for the first day or two. Then the part slowly warps, especially if it gets warm or comes into contact with solvents.
Root causeWhen a sheet forms below its ideal tempering temperature, the polymer chains get locked into stretched orientations before they have had time to relax. The part looks fine because the stress is frozen in. But it is there. Any exposure to heat, UV, or chemicals starts releasing it, and the part moves toward a lower-energy shape.
We also see this when acrylic or PC parts get cleaned with acetone or IPA after forming. If residual stress is present, solvent contact causes immediate crazing. The stress was already there — the solvent just triggered it.
Fix- Form at the full recommended tempering temperature, not the minimum that gets the sheet to move.
- Pre-heat the mold to 60 to 80°C. A warm mold slows the initial cooling rate when the sheet contacts the tool, giving the chains time to relax before they lock.
- For tight-tolerance parts, anneal after forming: hold the part at 10–20°C below forming temperature for 1–2 hours. This releases stress before the part goes into service rather than on the customer's shelf.
8. Forming Temperature Too Low or Too High
Too coldA sheet that has not reached full forming temperature does not flow into the mold visco-elastically. It gets forced in mechanically. The difference matters: mechanical stretching at too-low temperature creates high internal stress that releases progressively after the part leaves the mold. These parts often look acceptable right after forming and then slowly drift out of spec.
Too hotA sheet that is too hot starts cooling from a much higher temperature and has a longer way to go. The longer the cooling range, the more opportunity for differential cooling between zones. For crystalline materials like PP and HDPE, overheating means passing through a wider crystallization range on the way down, which increases the chance of uneven shrinkage.
Fix- Measure sheet surface temperature with an IR pyrometer or thermolabels. Oven air temperature is not reliable enough on its own.
- Acrylic: 160–180°C. ABS: 150–170°C. PP: 155–175°C with water-cooled molds.
Part 4
Geometry and Tooling
9. Asymmetric Wall Thickness
What you seeThe part warps asymmetrically. Thin areas set first, thick areas keep shrinking and pull the thin zones with them.
Root causeThick walls hold more heat and cool slower than thin ones. The thin areas cool first and lock in place. When the thick zones finally cool and contract, they are pulling against material that has already rigidified. The resulting stress bows the part toward the thick side. In deep-draw female molds without plug assist, the bottom corners are almost always the thinnest point, and this effect is most pronounced there.
Fix- Use plug assist for any draw ratio above 1:1. Without it, material distribution at depth is very hard to control — see mold design guide for draw ratio calculations.
- Zone-controlled oven heating: perimeter zones need to run hotter to compensate for heat loss at the clamping frame.
- Aluminum mesh screening over zones that thin excessively reduces local radiant energy from that heater zone.
- Draft angles: minimum 1–3° for male molds, 3–5° for female molds.
10. Male vs. Female Mold Shrinkage
Root causeWith female molds, the part shrinks away from the mold surface as it cools. Nothing constrains the shrinkage, so the part contracts fairly uniformly in all directions. With male molds, the part shrinks onto the tool. The outer dimensions are held by the mold while the inner surface shrinks freely. That stress differential between the constrained outer face and the free inner face is a direct driver of warping, and it gets worse the longer the part stays on the tool after it has already shrunk tight.
Fix- Male mold draft angles must be at least 3–5°. Below that, the part locks as it shrinks and you are fighting the mold to get it off.
- On male molds, consider demolding slightly earlier than you would on a female tool, then support the part in a cooling jig until it fully stabilizes.
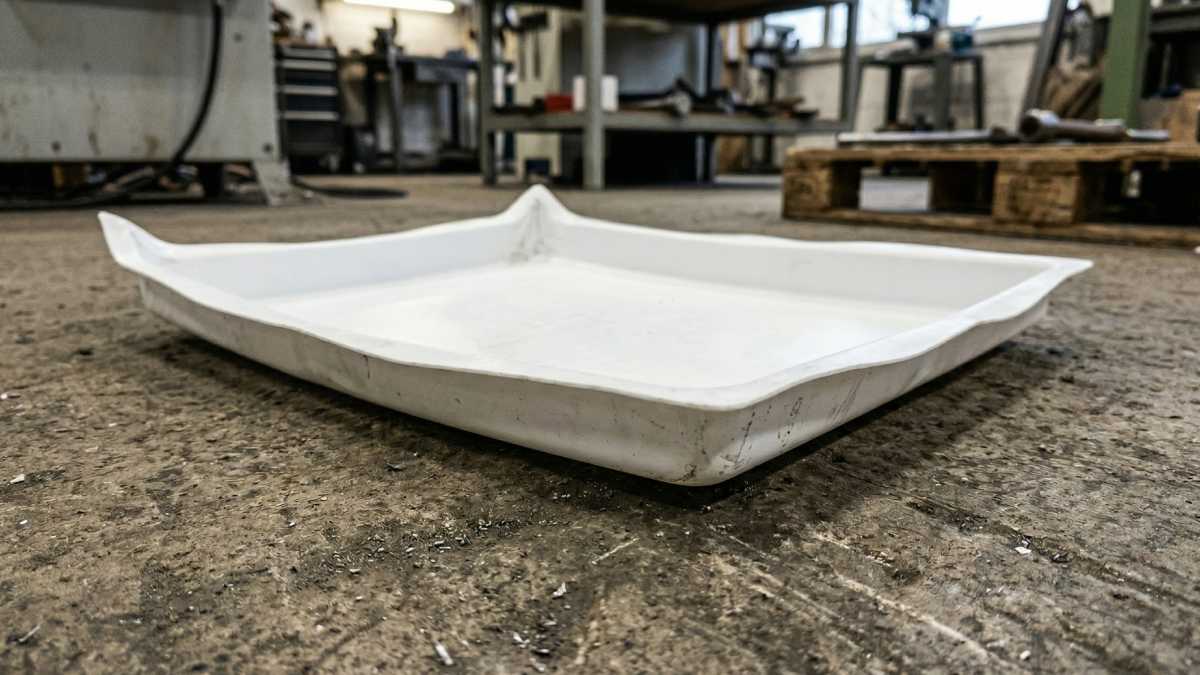
11. Large Flat Sections
What you seeLarge flat areas dome or dish. The part rocks on a flat surface. The base is not flat.
Root causeA flat panel has no structural curvature to resist differential shrinkage. The center cools slower than the edges, and the shrinkage gradient cups the panel. It is a geometry problem as much as a cooling problem. A slightly curved surface resists this naturally. A dead-flat surface does not.
Fix- Build a slight crown into flat mold sections. 1–2 mm of convexity over a 500 mm span is typically enough to guide the material into a stable geometry during cooling.
- Cooling jigs that support the full base of the part until it reaches ambient temperature.
- Trim only after the part has fully cooled. Cutting a warm flat panel releases residual stress asymmetrically at the trim line, which curls the edges.
12. Trimming Before Full Cooling
What you seeNo warping before trimming. Edge curl and dimension drift appear after the trim operation, especially on PP and HDPE.
Root causeWhile the part is still warm, the surrounding web of material constrains it. When you trim that web away, you release the constraint. If the part has not fully cooled, the freed edges continue to shrink without restraint and curl. The trim line becomes the failure point.
Fix- Cool parts completely before trimming. For PP and HDPE, this is not optional.
- Trimming jigs that hold the part geometry during and for at least 2 minutes after the cut.
Shrinkage by Material
Scroll right to see full table
| Material | Shrinkage | Warping risk | Cooling requirement |
|---|---|---|---|
| Acrylic (PMMA) | 0.4–0.6% | Low | Air |
| ABS | 0.4–0.7% | Low–medium | Air |
| Polycarbonate (PC) | 0.5–0.7% | Low–medium | Air |
| HIPS / PS | 0.4–0.7% | Low | Air |
| PETG | 0.2–0.5% | Low | Air |
| PP (polypropylene) | 1.5–2.2% | High | Water at 40–60°C |
| HDPE | 3.0–3.5% | Very high | Water, mandatory |
| LDPE | 1.6–3.0% | High | Water |
| PET | 0.5–1.5% | Medium | Temperature control |
Amorphous materials like acrylic, ABS, and PC shrink uniformly in all directions. You can manage warping with standard air cooling and reasonable cycle times. Crystalline and semi-crystalline materials like PP and HDPE are a different situation entirely. They crystallize during cooling, and that crystallization has to be controlled with water-cooled tooling or you will fight warping on every run.
All Causes at a Glance
Scroll right to see full table
| Root cause | When it appears | First fix |
|---|---|---|
| Demolding too early | Immediately after demold | Extend cooling cycle |
| Uneven cooling | Within minutes | Uniform fan coverage, active mold temp control |
| Progressive mold heating | Worsens through the run | Water-cooled mold thermostat |
| Chill marks | Immediately | Pre-heat mold and plug |
| High shrinkage — PP/HDPE | Immediate to hours | Water-cooled molds |
| Sheet molecular orientation | Consistent, directional | Rotate sheet 90°, specify <5% orientation |
| Residual forming stress | Hours to weeks | Higher forming temp, anneal |
| Forming temp too low | Delayed | Form at full tempering temperature |
| Forming temp too high | Immediately | Reduce temperature |
| Asymmetric wall thickness | Immediately | Plug assist, zone heating |
| Male mold shrinkage onto tool | Immediately | Increase draft, early demold plus jig |
| Flat section instability | Immediate to hours | Crown mold base, cooling jigs |
| Trimming before full cooling | After trim | Cool completely before trimming |
How to Find the Root Cause Quickly
When a warping problem appears on the line, these four questions tell you where to look first.
- Does it warp immediately or hours later? Immediate warping points to insufficient cooling, demolding too hot, or mold temperature imbalance. Delayed warping — stress, orientation, or crystallization issues.
- Is it the same direction on every part, or random? Consistent directional warping is sheet orientation. Try rotating 90 degrees. Random, variable warping across the run points to cooling inconsistency or mold temperature drift.
- Does it get worse as the run goes on? Yes — the mold is overheating. Add active cooling or extend cycle time. Worst at the start, improves as the run progresses — the mold was too cold. Run warm-up cycles before collecting product.
- Is the material PP, HDPE, or PET? Air cooling is not sufficient for crystalline polymers. Check that you have water-cooled tooling and review the mold water temperature setpoint.
Keep a simple run log: mold temperature, ambient temperature, cycle time, material batch number. Most warping patterns become obvious when you look at 20 to 30 consecutive cycles side by side.
FAQ
Why does my vacuum formed part warp after demolding even though it looked fine in the mold?
The part cooled unevenly after leaving the mold. The side that was against the tool and the open-air side cool at different rates, and the difference in shrinkage pulls the part out of shape. Extend the cooling cycle, keep fans running on the part while it is still in the mold, and check demolding temperature with a contact thermometer. For acrylic, that means waiting until the part reaches 65–70°C or below.
How do I fix warping in polypropylene thermoformed parts?
PP shrinks 1.5 to 2.2% and crystallizes during cooling, which means air cooling alone cannot produce uniform results. You need water-cooled molds set to 40–60°C. Form within the recommended window of 155–175°C, and hold parts in cooling jigs until they reach ambient temperature. Build shrinkage compensation into the mold dimensions from the start.
What causes thermoformed parts to warp days after production, not immediately?
Delayed warping is residual internal stress releasing over time. When a sheet forms below its optimal tempering temperature, the molecular chains lock into stretched orientations before they can relax. The part looks fine because the stress is frozen in. Heat, UV exposure, or solvent contact triggers release and the part moves. Form at the full recommended temperature and pre-heat the mold to 60 to 80°C to give the chains time to relax during forming.
Why does warping get worse as the production run continues?
The mold is heating up progressively. Without active cooling, an aluminum tool can go from 20°C at startup to 60°C or more after 50 cycles. At that point it is no longer pulling heat from the part at the same rate, and differential shrinkage gets worse with every cycle. Active water-cooled mold temperature control eliminates this entirely. Without it, run warm-up cycles at the start and monitor part dimensions through the session.
How do I tell if warping is from sheet orientation or uneven cooling?
Sheet orientation produces the same directional warp on every single part, consistently. Rotate the sheet 90 degrees relative to the mold and run a test. If the warp direction shifts with the sheet, orientation is your cause. Uneven cooling produces warping that varies between parts and changes with ambient conditions or mold temperature state across the run.
Related on the Blog
For a full overview of plastic types by forming behavior, shrinkage, and typical defect risk, see Thermoforming Plastics Types for Vacuum Forming. If warping is just one of several issues you're dealing with, the complete defect walkthrough is in the Vacuum Forming Troubleshooting Guide: 15 Most Common Defects Solved. Mold geometry questions — draft angles, draw ratios, vent placement — are covered in the Vacuum Forming Mold Design guide.
THERMOFORA Vacuum Forming Machines
Industrial vacuum forming machines — manufactured and ready to ship
From compact prototyping formats to full industrial sheet sizes. Every machine is built, tested, and shipped from our facility. Running in production across 24 countries.