
Vacuum forming mold design is where the process either works or falls apart. You can have a perfect sheet, a well-calibrated machine, and the right heating profile, yet still end up with parts that stick, warp, or show corner blow-out. Almost every time, the problem traces back to a design decision made at the tooling stage.
This breakdown covers what actually matters in vacuum forming mold design: the geometry rules, the numbers behind them, and the specific mistakes that show up on the shop floor when those rules get skipped. These recommendations draw from hands-on manufacturing experience — the same failure patterns appear across materials, part sizes, and industries. If you're new to the process, the vacuum forming basics overview covers how the process works before you get into tooling design.
Positive vs. Negative Molds: Which Type Do You Need?
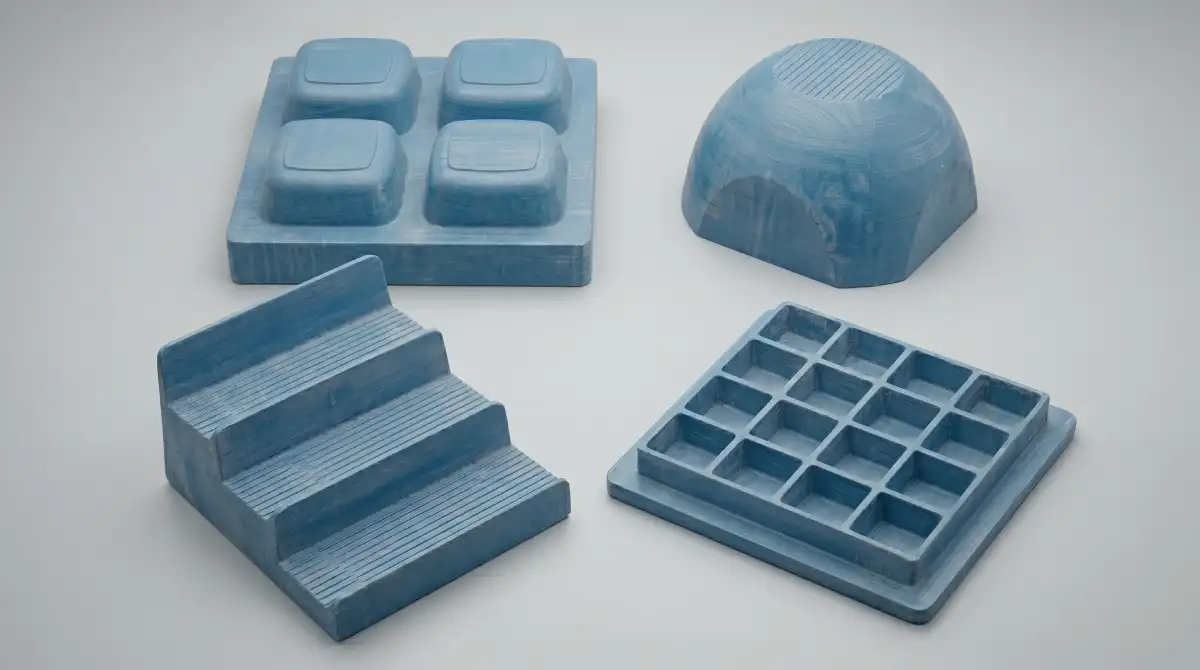
This is the first decision in vacuum forming mold design, and everything downstream follows from it. A positive (male) mold is a convex tool: the sheet drapes over it. A negative (female) mold is a concave cavity: the sheet is drawn into it. The geometry looks like an obvious choice until you think through where the material thins out, which surface gets defined by the tool, and what draft angle you need to get the part off cleanly.
| Characteristic | Positive (Male) | Negative (Female) |
|---|---|---|
| Tool geometry | Convex, projects above sheet plane | Concave, recessed below sheet plane |
| Controlled surface | Inside surface of part | Outside surface of part |
| Material distribution | Thicker at base, thins toward top | Thins at corners and base of cavity |
| Draft angle needed | 3–6 degrees minimum | 1–2 degrees sufficient |
| Release behavior | Part shrinks onto tool — harder release | Part shrinks away from walls — easier release |
| Tooling cost | Typically lower | Higher — cavity machining is more complex |
| Best for | Trays, tubs, parts needing accurate internal fit | Panels, covers, textured exterior surfaces |
Positive molds are the right choice when the inside dimension has to be accurate: think lids that fit over a mating component, or trays that hold items at specific positions. The inside surface contacts the tool and conforms to it precisely. The outside is shaped only by atmospheric pressure, so it has less definition.
Negative molds are chosen when the external surface quality matters: visible panels, parts with logos or texture, enclosure covers. The outside surface contacts the tool. The inside is less controlled.
Worth noting early: on a positive mold, the part cools and contracts around the tool, gripping it. On a negative mold, the part cools and contracts away from the cavity walls, which helps it release on its own. That difference drives the draft angle requirements for each type. For machines that can run both mold types across the full range of sheet sizes, see the THERMOFORA vacuum forming machine lineup.
Draft Angles: The Number That Determines Whether Your Part Releases

A draft angle is the taper on vertical walls — the deviation from 90 degrees that allows the part to slide off the tool as it cools. With no draft, the combination of material shrinkage and surface friction locks the part onto the tool. You end up with either a deformed part or a damaged tool when you try to pull it free.
For Positive (Male) Molds
The minimum draft angle is 3 degrees. In practice, 4–6 degrees is the working standard, and push toward the higher end on anything with significant depth. On a positive mold, the material shrinks and physically clamps around the tool as it cools. The taller the wall, the more surface area is in contact, and the more force is needed to release. A 3-degree angle on a 150 mm deep part can still be difficult to demold. At 5–6 degrees, release is reliable.
For Negative (Female) Molds
A minimum of 1 degree works for most applications. Since the material pulls away from the cavity walls as it cools, the force needed for release is much lower. For smooth surfaces, 1–1.5 degrees is usually enough. At 2 degrees, you have comfortable margin.
Textured Surfaces
Texture changes the calculation. Every 0.025 mm (0.001 inch) of texture depth requires an additional 1 degree of draft on top of your base angle. A moderate leather grain at 0.1 mm depth means adding 4 degrees. Miss this, and the part tears off the texture during demolding, leaving the surface damaged or permanently bonded to the tool.
Corner Radii in Vacuum Forming Mold Design: Why Sharp Angles Are a Material Distribution Problem
Every inside corner on a mold is a stress concentration point and a thinning point. When the sheet stretches over or into geometry, material doesn't flow cleanly around a sharp corner — it bridges across it, leaving a thin, stressed zone where the radius should be. That zone is where parts crack under load, or fail the drop test.
The minimum corner radius should be no less than the original sheet thickness. If you're running 3 mm ABS sheet, inside radii need to be at least 3 mm. In practice, use larger radii whenever the design allows — 2–3x the sheet thickness as a target. The right sheet thickness for your application also affects how aggressively you can form — see choosing the right plastic sheet for vacuum forming for thickness and material selection guidance.
| Part Depth | Minimum Corner Radius |
|---|---|
| Up to 75 mm | 0.4–3.2 mm (match to sheet thickness) |
| 75–150 mm | 3.2–6.4 mm |
| Over 150 mm | 6.4 mm minimum, larger where possible |
These are floor values, not targets. If your design process treats the minimum as the default, parts will be marginal. Treat the minimum as a lower bound and aim for comfortable values above it — parts will pass testing the first time rather than after a round of fixes.
Draw Ratio: How Deep You Can Go Before the Math Works Against You
Draw ratio measures how much you're stretching the sheet. It's calculated as the surface area of the formed part divided by the surface area of its base footprint. At a draw ratio of 2:1, the sheet has stretched to twice its original area, meaning wall thickness has dropped to roughly half the original. At 3:1, you're down to about a third.
| Draw Ratio | Wall Thickness Retained | Notes |
|---|---|---|
| 1:1 | 100% | No significant stretching — flat or very shallow parts |
| 1.5:1 | 60–70% | Standard range, no special measures needed |
| 2:1 | 45–55% | Acceptable with good heating uniformity |
| 2.5:1 | 35–45% | Plug assist recommended for most materials |
| 3:1 | 30–35% | Plug assist required — critical thinning at corners |
| Above 3:1 | Below 30% | High risk zone — redesign or twin-sheet forming |
Material sets the practical ceiling. ABS and HIPS can be pushed to 3:1 with plug assist. PETG and polycarbonate peak around 2.5:1. Polypropylene should be kept under 1.5:1 — its narrow processing window makes consistent distribution at higher ratios very difficult.
When the geometry pushes you above the practical limit for a single sheet, twin-sheet thermoforming is the answer. Two sheets formed simultaneously and fused together produce hollow double-wall structures without the thinning constraints of single-sheet forming. High draw ratios combined with uneven cooling are also the leading cause of post-demold warping — see why vacuum formed parts warp and how to fix it for a dedicated breakdown.
Vacuum Vent Holes: Size, Placement, and Spacing
The vacuum holes on a mold evacuate the air trapped between the sheet and the tool surface. If air can't escape, the sheet can't conform — you get rounded corners, poor detail, and visible high spots where air pockets sat.
Hole Diameter
Standard vent hole diameter is 0.5–0.8 mm. Use 0.5 mm at critical areas (corners, fine detail) and 0.8 mm in open areas. For thin films and cosmetic parts, stay at 0.4–0.5 mm — anything larger marks the surface.
Conical holes (drilled with a taper that expands behind the mold surface) evacuate faster than straight bores of the same face diameter and are less prone to clogging. In aluminum tooling, they're worth the extra machining time.
Placement Rules
- Every inside corner needs a vent. Air pockets concentrate in corners — the sheet contacts the tool last there.
- Deep cavities need vents at the base. The last air to escape is at the deepest point of a negative mold.
- Around raised features: any protrusion on the mold traps air behind it. Add vents on both sides of raised ribs or bosses.
- Along the perimeter: a row of vents 5–10 mm inside the sheet contact zone catches air that migrates outward during forming.
Spacing
Standard spacing is 25–50 mm center-to-center in open areas. In critical zones (corners, fine features), bring it to 15–20 mm.
3D-Printed Porous Molds
FDM-printed molds with sparse gyroid infill (around 20%) and no top surface layers act as self-venting tools. Vacuum passes through the body of the mold without any drilled holes. This works well for prototype and low-run tooling in ABS or PC filament, and eliminates the vent hole design problem entirely. For runs under a few hundred parts, it's often the right approach — particularly popular for cosplay prop making where quick iteration matters more than cycle time.
Mold Materials: Aluminum, Resin, Wood, MDF, Epoxy and 3D-Printed
Mold material selection comes down to three things: how many parts you need to run, how precise the part needs to be, and what the tooling budget is.
| Material | Suitable Volume | Surface Quality | Thermal Conductivity | Cost | Notes |
|---|---|---|---|---|---|
| Machined aluminum | 10,000+ cycles | Excellent | High | High | Production standard. Supports cooling channels. |
| Cast aluminum | 2,000–10,000 | Good | Good | Medium–High | Lower cost than machined for large tools. |
| Epoxy/urethane resin | 1,000–5,000 | Good | Low | Medium | Fast to produce. Degrades under sustained heat. |
| Fiberglass (GRP) | 1,000–5,000 | Good | Low | Medium | Proven in production tooling. Lightweight, easy to repair. Requires a master plug to lay up against. |
| Wood/MDF with epoxy coating | 200–2,000 | Good | Low | Low–Medium | Epoxy shell seals moisture and adds surface hardness. Suitable for mid-volume production runs. |
| Wood/MDF | 1–50 | Fair | Very low | Low | Prototype only. Absorbs moisture, off-gases at temperature. |
| FDM 3D print | 1–200 | Moderate | Very low | Lowest | Fast and cheap. Porous infill enables self-venting. |
| SLA 3D print | 10–100 | Excellent | Very low | Low–Medium | Best surface in 3D-print options. Requires drilled vents. |
Aluminum is the only material with thermal conductivity that actually matters for cycle time. A well-cooled aluminum mold pulls heat out of the part quickly and consistently. Resin and printed tools can't do that — the mold acts as an insulator, so cycle times are longer and less predictable.
Start with a resin or printed tool while validating the design. Move to aluminum once the geometry is confirmed and the part goes into production. For choosing the machine that will run your tooling, see how to select a vacuum forming machine.
Cooling System Design for Aluminum Molds
For any aluminum mold that will run more than a few hundred parts, an integrated cooling circuit is worth designing in from the start. Channels are machined into the mold body, and water or a water-glycol mixture circulates to pull heat out of each formed part.
Channel placement: channels should run parallel to the mold surface at a depth of 1.0–1.5 times the channel diameter. Closer than 1x diameter and the mold wall may be too thin for structural integrity. Further than 1.5x and heat transfer efficiency drops.
For effective heat transfer, the coolant needs to flow in turbulent regime (Reynolds number above 4,000 in the channels). In practice, this means running at a flow rate that produces visible turbulence at the outlet. Target a flow velocity of 1–3 m/s in the channels for reliable turbulent regime — most mold temperature controllers handle this automatically if the circuit is sized correctly.
Undercuts: When You Can't Avoid Them
An undercut is any feature that prevents the part from releasing from the mold in the normal pull direction. Slots, hooks, internal flanges, and reverse-angle walls all create undercuts. The standard advice is to design them out. Sometimes that's not possible.
Collapsible Cores
The mold is split into segments that collapse inward after forming, clearing the undercut zone before the part is released. This adds mechanical complexity and cost, but it's the cleanest solution for deep undercuts.
Side Actions
Mechanical inserts that form the undercut area slide out perpendicular to the pull direction before demolding. Common in production tools where the undercut is a consistent feature across a run of identical parts.
Material Flexibility
For parts made from polypropylene or polyethylene, small undercuts (typically under 5% of the wall dimension) can often be popped out of the mold by flexing the part during demolding. This only works on thin-walled parts with limited undercut depth. Don't count on it for rigid materials like PC or ABS.
Angular Release
If the undercut is on one side only, designing the opposite wall with extra draft can allow the part to be tilted out of the mold at an angle. This requires planning from the beginning — it's not something you retrofit.
Plug Assist: Designing the Mold Around It
Plug assist is a mechanical pre-stretching step used for deep-draw parts. A plug pushes down into the heated sheet before vacuum is applied, redistributing material from the walls toward the base. If your part has a draw ratio above 2:1, plug assist should be part of the plan from the start.
Plug Material
Aluminum plugs transfer heat to the sheet on contact, causing cold marks. If you use aluminum, preheat the plug to within 10–15 degrees C of the sheet forming temperature. A better default is syntactic foam (HYTAC or equivalent). Syntactic foam has very low thermal conductivity — it pre-stretches the sheet without chilling the contact zone.
Plug Geometry and Clearance
The plug should be 5–15% smaller than the mold cavity in all dimensions. This clearance allows the sheet to wrap around the plug without being pinched between it and the mold walls. The plug profile should match the mold geometry at the base but taper off toward the sides. Copying the mold exactly overconstrains the sheet and causes tearing on entry.
Shrinkage Compensation: Building the Correctly Sized Vacuum Forming Mold

Every polymer shrinks as it cools. If you build a mold to the exact dimensions of your finished part, the part will come out undersized. The mold has to be built larger — scaled up by the material's shrinkage factor.
| Material | Shrinkage Range | Notes for Mold Design |
|---|---|---|
| HIPS | 0.5–0.7% | Consistent and predictable. Good starting material for new designs. |
| ABS | 0.4–0.8% | Use 0.6% as default. Check sheet batch for variance. |
| PETG | 0.2–0.5% | Low shrinkage — tight dimensional tolerance achievable. |
| Acrylic (PMMA) | 0.2–0.4% | Lowest shrinkage. Excellent for optical parts. |
| Polycarbonate | 0.5–0.7% | Requires accurate mold temp control to minimize variation. |
| HDPE | 1.5–3.0% | High and variable. Requires mold temp uniformity and cooling circuit. |
| Polypropylene | 1.0–2.5% | Depends heavily on crystallinity and cooling rate. |
Polyolefins (HDPE and PP) are the most challenging because their shrinkage is both high and variable. A 1.5–3.0% range in HDPE means the mold dimension that works at one cooling rate may produce out-of-spec parts at another. For critical dimensions in HDPE, a temperature-controlled mold and consistent cycle times are not optional. Each material also brings its own processing constraints beyond shrinkage — see thermoforming plastics: forming temperatures and material behavior for draw limits and material-specific processing data across all common thermoplastics.
Mold Surface Finish: Ra Values, Polishing vs. Sandblasting, and Release Behavior
The surface finish of a vacuum forming mold directly transfers to the part. Whatever texture is on the tool face — machining marks, sandblast pattern, EDM grain, or a polished mirror — will appear in reverse on the formed part. This is a design parameter, not a machining afterthought.
Ra Values and What They Produce
| Ra (μm) | Finish Type | Part Surface Result | Typical Use |
|---|---|---|---|
| 0.2–0.4 | Mirror polish | High gloss, reflective | Optical parts, transparent acrylic panels |
| 0.4–0.8 | Fine polish | Gloss, smooth | Cosmetic covers, consumer product housings |
| 0.8–1.6 | Smooth matte | Satin, low sheen | General production standard — most industrial parts |
| 1.6–3.2 | Fine texture / light bead blast | Matte, subtle grain | Panels, diffusing surfaces, hides minor sheet defects |
| 3.2–6.3 | Medium texture / heavy bead blast | Visible grain, leather-like | Textured covers, grip surfaces |
| 6.3+ | Coarse texture / EDM pattern | Aggressive grain, high texture depth | Specialty appearance parts — requires significant extra draft |
Surface Finish and Draft Angle Interaction
Ra values describe microscale surface roughness — they are not the same as macro texture depth. Draft angle requirements are driven by the peak-to-valley depth of the texture pattern: a leather grain at 0.1 mm depth requires 4° of additional draft; a deep EDM pattern at 0.25 mm depth requires 10°. Coordinate with your texture supplier to confirm the peak-to-valley depth of any pattern before finalising draft angles.
Multi-Cavity Mold Layout: Spacing, Vacuum Balance, and Trim Efficiency
When production volumes justify it, running multiple cavities on a single mold base multiplies output without multiplying cycle time. The tradeoffs are in layout complexity, vacuum distribution, and the geometry of what ends up as scrap between parts.
Cavity Spacing
The working standard is 50–75 mm between cavity walls for parts under 300×300 mm. Tighter spacing causes webbing — material bridges between features rather than conforming to both independently. For deep-draw cavities, increase spacing to at least 1× the cavity depth between walls.
Vacuum Balance
All cavities need equal vent hole density and equal vacuum path resistance. An unbalanced layout — where one corner of the mold sits further from the vacuum inlet — will form that cavity last, leaving it with poorer definition. Solutions: use a central vacuum manifold, increase vent density at far cavities, or use a symmetric vacuum distribution channel layout in the mold base.
Common Vacuum Forming Mold Design Problems and How to Fix Them
Most of the problems below stem from predictable design errors — geometry that doesn't account for how plastic actually moves at forming temperature. For a broader look at where vacuum forming has inherent limitations, vacuum forming disadvantages covers the structural constraints that drive many recurring issues.
1. Webbing Between Features
What you seeThin fins of plastic stretched between adjacent mold features.
Root causeFeatures are too close together. Material bridges the gap rather than conforming to both features independently.
Fix- Increase spacing between features.
- Add angled runout blocks at the base of cores.
- Raise sheet temperature and slow the vacuum application rate.
2. Cold Marks (Chill Marks)
What you seeVisible stripes or rings on the part surface corresponding to where the mold first made contact.
Root causeThe mold surface is cold relative to the sheet. At first contact, the cold tool chills a thin layer of the sheet, stiffening it before the rest of the forming is complete.
Fix- Preheat the mold to 40–70% of the forming temperature.
- Switch to syntactic foam plugs if you're using aluminum plug assist tools.
3. Poor Corner Definition
What you seeRounded corners on the part where the design calls for sharp transitions.
Root causeAir trapped in corners that can't escape fast enough.
Fix- Add 0.5 mm vents directly at each corner.
- Check existing vents are not clogged and that the vacuum circuit pulls full vacuum within 2–3 seconds of forming.
4. Part Sticking to Mold
What you seePart locks onto the tool after forming. Release requires force and the part is damaged in the process.
Root causeInsufficient draft angle, overcooling, or surface roughness that creates mechanical interlock.
Fix- Verify draft angles — positive molds need at least 4 degrees.
- Apply a release agent (silicone or PTFE spray) as a short-term fix.
- Add a blow-off pulse: a short burst of compressed air back through the vacuum ports that breaks the part free.
5. Warping After Demolding
What you seePart releases cleanly but deforms as it cools on the bench.
Root causeUneven cooling while the part is still on the mold.
Fix- Keep the part on the mold longer — until it cools to within 15°C of room temperature for ABS, or 20–25°C for PP.
- Check that the cooling circuit (if present) is symmetric.
6. Thinning at Corners
What you seeWall thickness at corners is significantly lower than on flat walls. Parts fail structurally or crack at corner zones under load.
Root causeDraw ratio too high, or corner radii too small. Corners are the last areas to receive material — the sheet has already stretched significantly by the time it reaches them.
Fix- Increase corner radii to at least 2× sheet thickness.
- Add plug assist to redistribute material before vacuum engages.
- Start with thicker sheet or reduce draw ratio by adjusting part depth.
7. Mold Mark-Off (Print-Through)
What you seeTexture, machining lines, or vent hole imprints visible on the formed part surface.
Root causeMold surface finish too coarse for the application, or excessive vacuum rate forcing material into surface irregularities. Vent holes larger than 0.8 mm will mark cosmetic-grade parts.
Fix- Polish the mold surface to Ra 0.8–1.6 μm for smooth-finish parts.
- Reduce vent diameter in visible surface areas to 0.4–0.5 mm.
- Slow the vacuum application rate to reduce the pressure forcing material into surface detail.
8. Vacuum Leak at Parting Line
What you seeIncomplete forming, poor surface definition on one side, or uneven wall thickness. Cycle time extends as the machine struggles to reach target vacuum level.
Root causeAir leaking in at the mold-to-clamp frame interface, reducing effective vacuum pressure below what the part geometry requires.
Fix- Inspect the clamp seal — replace silicone or rubber gasket if worn or compressed flat.
- Add a perimeter seal strip around the mold base where it contacts the machine platen.
- Verify vacuum level — system should pull to at least −0.085 MPa within 2–3 seconds. Slower than this indicates a leak or undersized pump.
FAQ
What are the key rules of vacuum forming mold design?
The core rules of vacuum forming mold design are: draft angles of at least 3–6 degrees on positive molds and 1–2 degrees on negative molds; corner radii no smaller than the sheet thickness; draw ratio kept under 2:1 without plug assist; vent holes of 0.5–0.8 mm at every corner and 25–50 mm apart in open areas; and mold dimensions scaled up by the material's shrinkage factor.
What is the minimum draft angle for a vacuum forming mold?
For positive (male) molds: 3 degrees minimum, 4–6 degrees working standard. For negative (female) molds: 1 degree minimum, 1.5–2 degrees for comfortable release. Add 1 degree per 0.025 mm of texture depth to the base draft angle for any textured surface.
How do I calculate the mold size to account for shrinkage?
Multiply the target part dimension by (1 + shrinkage factor). For ABS with 0.6% shrinkage, a 200 mm part dimension requires a mold dimension of 200 × 1.006 = 201.2 mm. Use the midpoint of the material's shrinkage range as your default, and keep the mold temperature consistent across runs to keep shrinkage predictable.
What size should vacuum vent holes be in a thermoforming mold?
Standard diameter is 0.5–0.8 mm. For cosmetic parts, stay at 0.4–0.5 mm to minimize marks on the part surface. Space holes 25–50 mm apart in open areas, 15–20 mm in critical areas like corners and deep features. Always place a vent at every inside corner.
What material should I use for a vacuum forming mold?
Under 200 parts: FDM 3D-printed (ABS or PC) or urethane resin. 1,000–5,000 parts: cast epoxy or urethane. Above 5,000 parts: machined aluminum with cooling channels — the only material with thermal conductivity for consistent cycle times.
How do I prevent parts from sticking to a positive mold?
Check draft angles first — less than 4° on a deep positive mold is the most common cause. Apply a release agent (PTFE or silicone) and add a blow-off pulse through the vacuum ports at release. Persistent sticking: increase mold surface finish to Ra 0.8 or smoother.
Can you 3D print a vacuum forming mold?
Yes. FDM-printed molds in ABS or PC filament work well for short runs up to 200 cycles. A sparse gyroid infill (15–20%) with no solid top layers creates a self-venting mold — no vent holes needed. SLA-printed molds give better surface quality but require drilled vents and are more heat-sensitive.
What is the ideal draw ratio for vacuum forming?
ABS and HIPS: up to 2:1 without plug assist, 3:1 with. PETG and polycarbonate: up to 2.5:1. Polypropylene: under 1.5:1. Above 3:1 requires twin-sheet forming or a geometry redesign.
How thick should the walls of a vacuum forming mold be?
For machined aluminum: minimum 15–20 mm wall thickness for small molds (under 300×300 mm), 25–30 mm for large-format tools. For FDM-printed molds: 8–15 mm solid shell with 15–20% infill. For epoxy or urethane resin molds: 20–30 mm minimum to maintain structural integrity under vacuum pressure.
Vacuum Forming Mold Design Checklist
Use this checklist before sending a mold to machining or into production. Each item corresponds to a failure mode documented above.
Geometry
- Draft angles: ≥3° minimum on positive molds (4–6° recommended working standard), ≥1° on negative molds — verified on all walls
- Textured surfaces: additional 1° draft per 0.025 mm texture depth added
- Corner radii: ≥ sheet thickness on all inside corners, target 2–3× sheet thickness
- Draw ratio calculated and within limits for selected material (≤2:1 without plug assist)
- Plug assist planned for draw ratios above 2:1
- Undercuts identified and addressed (collapsible core, side action, or flexible material)
Vent Holes
- Vent at every inside corner (0.5 mm diameter)
- Vents at deepest points of negative cavities
- Vents on both sides of raised ribs and bosses
- Spacing: 25–50 mm in open areas, 15–20 mm in critical zones
- Cosmetic surface areas: vent diameter ≤0.5 mm
Surface Finish
- Target Ra specified for mold face (Ra 0.8–1.6 μm for general production)
- Finish and draft angle reviewed together for textured areas
- Vent hole diameter in cosmetic zones ≤0.5 mm
Dimensions & Shrinkage
- Mold dimensions scaled up by material shrinkage factor
- Shrinkage factor confirmed for specific material and grade
- Plug clearance set to 5–15% smaller than mold cavity (if applicable)
Mold Material & Cooling
- Mold material matched to planned production volume
- Cooling channels designed for aluminum tools (depth = 1.0–1.5× channel diameter)
- Cooling circuit symmetric relative to forming surface
- Clamp seal and parting line checked for vacuum integrity
For sheet selection — thickness, material grade, and how those choices interact with mold geometry — see choosing the right plastic sheet for vacuum forming. For a full breakdown of defects that appear after molding, see vacuum forming defects and fixes. For cosplay and hobby applications where 3D-printed molds and fast iteration matter more than cycle time, see vacuum forming for cosplay.
THERMOFORA Vacuum Forming Machines
Industrial vacuum forming machines — manufactured and ready to ship
From compact prototyping formats to full industrial sheet sizes. Every machine is built, tested, and shipped from our facility. Running in production across 24 countries.